
Tico came running in from the backyard shaking his head. I noticed something was flying off him and I calmly wondered what he was shaking off; his Velcro-like fur often collects burrs and grass and leaves. But then I suddenly realized with alarm what was being spread all over my house: blood! Tico was bleeding!
Somehow – my best guess is a rose thorn – he received a tiny (less than 1/4 of an inch) cut on the inside of ear and it was bleeding profusely. He wasn’t too bothered, but it must have felt strange as it bled and he responded by shaking his head, decorating the walls, floors, furniture, and curtains with a red splatter pattern.
Almost as quickly as the injury had revealed itself to me, I was able to stop the bleeding and sanitize and seal the wound. How, so fast? Because I have not one but two pet first-aid kits equipped and ready at all times.
I corralled him in the bathroom and grabbed the kit. After flushing the wound with a saline rinse and checking for foreign objects, I used a non-stick gauze pad to press against the injury and slow the bleeding. Soon it was down to a trickle and allowed for the application of liquid bandage, sealing the wound. No panic. No running around in circles looking for the equipment I needed, wasting time while Tico painted the walls with blood!
IN FAVOR OF BEING PREPARED
When I began assembling my pets’ first-aid kits many years ago, I started with a human outdoor wilderness kit and added to it. As my kits grew, I decided to keep the human kit stored along with my pets’ kits, as many of the items can be used for both. I keep these kits updated, packed, and ready to go, next to my even larger disaster preparedness kit.
Why two pet first-aid kits? One is a scaled-down version that I bring with me when taking my dogs on road trips and on backwoods hikes. It’s contained in a small, red (making it easy to find) Victorinox Swiss Army backpack with lots of separate compartments and pockets that are convenient for keeping items organized.
The other, larger kit is contained in a larger gear bag that contains everything, and in extra amounts. (The kit that contains first-aid items for humans, which I bring along on hikes and other adventures, is the smallest of the three. Ha ha!)
I keep a small amount of basic wound-care supplies in the little red backpack at all times, and add or subtract more items before leaving the house with my dogs for an outing. The items I add will depend on where I’m going and what I will be doing with the dogs. Going hiking in the mountains? Anticipating scrambling over granite escarpments? I’d likely add a splint, extra cotton padding, and a couple rolls of stretchy, self-adhesive bandage material. If I’m headed for a long stay at a distant friend’s house, I likely don’t need the emergency space blanket, water purification tablets, headlamp, and dog sunscreen.
Soft gear bags with zippers work for me. Other people may prefer storing their kits in tool boxes, tackle boxes, or watertight storage bins. Before you buy a special container for your kit or kits, it’s a good idea to assemble the contents first so that you know what size container you will need. All this stuff adds up!
FIRST AID ITEMS
Below, and on the following pages, is a list of everything I have in one or both of my two pet first-aid kits, along with a short description of each item’s use.
If the list looks ridiculously long, it is! But my dogs and I are active and we get outdoors a lot. You might have a less accident-prone dog! Also, I’m a “better to be safe than sorry” sort of dog owner; I like being prepared for anything that my crazy little dogs might throw my way. You could probably consider yourself well prepared with half of this stuff. Or, if you participate in dog sports or something like search and rescue with your dog, you might need even more in your kit. Customize your kit for your individual needs.
It’s often suggested that people go through their first-aid kits on New Year’s Day each year, checking bottles for leakage, looking at expiration dates, and determining whether the supplies are present in adequate amounts. When doesn’t matter, but you should go through your dog’s kit at least once annually – and not just when it was needed.
✓ Antibiotic ointment. Topical antibiotic ointments and sprays containing bacitracin, neomycin, and polymyxin, applied before bandaging, help prevent infections from developing in wounds. Avoid any product that contains a corticosteroid like hydrocortisone. Individual-use packs or sprays (which absorb faster, making it less likely for a dog to ingest) are ideal for pet first-aid kits.
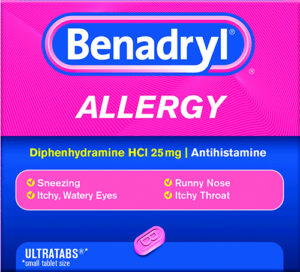
✓ Antihistamines (oral and topical). The safest oral antihistamine that can be given to dogs is diphenhydramine (best known as Benadryl). It’s useful for any allergic reaction, especially the dramatic reaction to bee stings. While diphenhydramine is safe for most dogs, check with your vet for the proper dosage for your dog’s weight. Make sure the product contains only diphenhydramine as the active ingredient and does not contain xylitol (this sweetener is toxic to dogs). Note: Your dog may become sleepy after this medication has been given. The topical form of diphenhydramine product (for external use only) can also temporarily relieve pain and itching associated with bites and stings. It may be delivered as an “itch relief stick,” spray, or gel.
✓ Artificial tear solution. To soothe irritated and inflamed eyes, supplement aqueous tear production and restore lubrication – especially after using eye wash. Individual-use packs are ideal for preventing contamination.
✓ ASPCA Animal Poison Control Center number. This is your best resource for any animal poison-related emergency, 24 hours a day, 365 days a year: (888) 426-4435. A consultation fee will apply.
✓ Bandage tape. For securing gauze wrap or bandage in place.
✓ Battery-powered trimmer. To trim fur away from wounds and to remove mats and sticky substances from fur (a safer option than using scissors). Battery-powered (because electricity may not be available) trimmers probably can’t do double-duty as grooming clippers but are ideal for limited use in a first-aid kit. Remember to keep extra batteries in your kit.
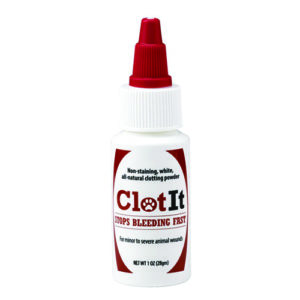
✓ Blood clotting powder. Quickly stops bleeding of wounds. One brand, Clot It, is a non-staining, non-stinging blood-clotting powder made up of natural minerals designed to rapidly and painlessly stop bleeding in minor to severe external wounds. Clot It is odorless, does not clump, and has an unlimited shelf-life. It accelerates the body’s natural coagulation processes, slows blood flow by constricting local vessels and capillaries, and rapidly absorbs plasma at the wound site.
✓ Blunt-tipped bandage scissors. Bandage scissors are angled-tip scissors with a blunt tip on the bottom blade, designed to safely lift bandages away from skin without gouging the skin. They may also be used to cut tougher material such as plaster and fabric.
✓ Calendula ointment. For external use to promote healing of cuts, scrapes, and minor burns. Formulated with the Calendula flower, commonly used for wounds, rashes, infection, inflammation, and more.
✓ Camping pack towels. These fast-drying tear-resistant towels not only pack down to a small size, they are also great for absorbing water and repelling dirt. Towels can also double as slings or stretchers to stabilize an injured animal and prevent further injury during transport.
✓ Cold packs (instant). The application of cold is an inexpensive and non-invasive method of reducing pain, swelling, and inflammation, Apply cold packs to injured area as quickly after the injury as possible (use on new injuries within 24 to 48 hours) for only 10 to 20 minutes at a time or until your dog’s skin feels cold to the touch, stopping to examine the skin every 5 to 10 minutes. Make sure to use a barrier – such as a towel – between the cold pack and the body to avoid tissue damage.
✓ Collapsible cup/disposable cup. To mix solutions or hold water for cleaning a wound.
✓ Cotton balls and cotton-tipped swabs. For gentle and delicate cleaning of wounds and sensitive areas. To avoid damaging your dog’s ears and eyes, never insert Q-tips or swabs into your dog’s ears or eyes without first without first being shown how to do it safely by your veterinarian.
✓ Cotton padding roll. Provides a layer of soft cushioning bulk between primary bandage layer and wrap. Conforms to body contours and mild stretch and cohesiveness allows padding to stay in place.
✓ Credit card-like card or piece of cardboard. To scrape away a bee stinger attached to your dog (wasps and hornets do not leave a stinger behind). Do not use tweezers, as they may squeeze more venom out of the stinger sac into the skin. Sting sites can be soothed with a thick paste of baking soda and water, an antihistamine stick (like Benadryl), or with application of a cold pack.
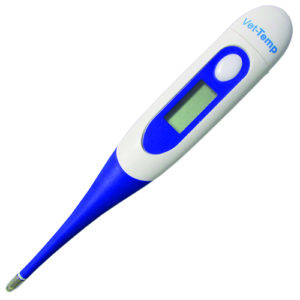
✓ Digital thermometer. The ideal thermometer for checking your dog’s temperature (the most reliable way is rectally) should be easy to use; work quickly (minimizing stress on both you and your dog); have a large, easy-to-read LCD display; and is easy to clean (wash with soap and water or use rubbing alcohol). Normal body temperature for dogs is 101° to 102.5° Fahrenheit (38.3° to 39.2° Celsius), but some dogs maintain a baseline temperature a little above or below the average, so it’s a good idea to take his temperature when he’s resting at home a few times in order to learn what “normal” is for him. If your dog’s temperature rises above 104° F or falls below 99° F, this is an emergency and a visit to the veterinarian is required. We like the Vet Temp Rapid FlexibleDigital Pet Thermometer, available in stores and online.
✓ Disinfectant wipes. Soap and water may not be accessible.
✓ Emergency information about your dog, including:
• A photo of your dog.
• A copy of your dog’s medical records,
including medications and vaccination history.
• Contact information for your veterinarian.
• “In Case of Emergency” number for someone who knows
your dog in case you are incapacitated or unavailable.
✓ Emergency warming blanket. Sometimes referred to as a first-aid blanket, space blanket, Mylar, thermal, or weather blanket. Use in emergency situations to reduce heat loss in an injured or traumatized dog’s body in case of shock.
✓ Emergency whistle. Use to call for your dog or alert others to your location.
✓ Exam gloves. To prevent infection, protect wound from contamination, and to protect wearer.
✓ Extra collar and leash. Slip leads are lightweight and non-bulky and can double as a muzzle.

✓ Eyewash (sterile irrigating solution). To flush and clean your dog’s eye(s) to help relieve irritation, discomfort, itching, or remove loose foreign material. Can be helpful with allergies. Can also be used for cleaning wounds in the event that a clean wound flush is not available.
✓ First-aid manual. Provides instructions on how to handle myriad pet emergencies.
✓ Flashlight or headlamp. Provide a light source at night or whenever extra illumination is needed. Headlamps allow for hands-free examination. Don’t forget extra batteries.
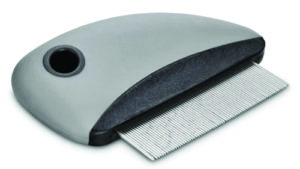
✓ Flea comb. Great for removing tick nymphs that are not attached but crawling over fur.
✓ Gauze pads/sponges. Beneficial for wound-care applications such as controlling bleeding and general cleaning. It can also be used as a temporary absorbent dressing over wounds but be aware that these are not non-stick and could adhere to the wound and skin.
✓ Gauze roll/wrap. Can be used to wrap an injury, provide compression and pressure, as a primary dressing for wound care, or to cover and secure a primary layer. Can be used to secure limbs that require limited mobility. Can also be used to make a muzzle (dogs who are in pain may snap as their injuries are being treated).
✓ Hand sanitizer. Soap and water may not be accessible.
✓ Hydrogen peroxide (must be 3%). To induce vomiting in certain cases. Never induce vomiting without first speaking with a veterinarian or animal poison control. Hydrogen peroxide is not a good way to clean or disinfect a wound as it is detrimental to the cells responsible for healing the wound. Hydrogen peroxide is also an ingredient in the most effective deskunking formula (1 qt. 3% hydrogen peroxide, 1/4 cup baking soda, 1 teaspoon liquid dish soap).
✓ Liquid bandage/tissue adhesive. For closing minor wounds, eliminating the need for bandages or in areas where bandage application is not feasible (like Tico’s ear).
✓ Lubricant. To coat the thermometer to facilitate taking your dog’s temperature rectally; water-based, individual-use packets are ideal.
✓ Magnifying glass. There are terrific little handheld, battery-operated, lighted magnifying glasses available for first-aid kits (a 30X magnification works well). Useful for close inspection of wounds and removing ticks. Remember to keep extra batteries in your kit.
✓ Muzzle. Injuries are painful and a dog in pain may try to bite, especially when you are trying to administer first aid. It’s a good idea to prevent a bite by using a muzzle. The best muzzle is one that you have already fitted and trained your dog to be comfortable with. In an emergency, a leash, soft cloth, gauze roll, and towels are options for use. Check your first-aid book on how to use a makeshift muzzle. Never muzzle a dog who is vomiting.
✓ Non-stick bandage pads. Ideal for placement as the first layer over a wound. The ventilated film allows the wound to breathe and fluid be absorbed into the pad, and the non-stick covering prevents sticking to the wound and disrupting any healing process that has begun. Available in singe-use packages and can be cut or trimmed to fit most wounds.
✓ Notebook, leakproof pen, and Sharpie kept in a sealed plastic bag. Keep notes about any treatments given your dog so that it can be relayed to your veterinarian. Sharpies are good for writing on a multitude of surfaces and are smudge-resistant.
✓ Paw balm. Used to protect paws from substances on the ground, keep them hydrated and healthy.

✓ PawFlex bandages. These bandages stretch, are disposable and reusable, and made from fabric that is water resistant, breathable, non-adhesive, and non-irritating. PawFlex has bandages currently available in six sizes to cover any wound, especially wounds around joints that can be difficult to protect. (See pawflex.com for purchasing information.)
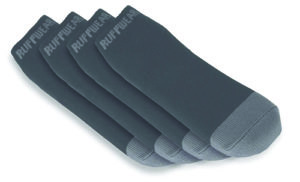
✓ Paw socks. While a resourceful owner can modify a human hiking sock to cover an injured paw out on the trail, these commercial socks fit better and stay on without constant adjustments: see ruffwear.com/collections/dog-boots/products/dog-socks-barkn-boot-liners.
✓ Pest repellent. A flea/tick repellent should be applied to dogs prior to hiking or going other places that are of concern for exposure. In some backwoods locations, a topical repellent for flying insects (biting flies, gnats, and mosquitoes) is needed to prevent these insects from tormenting dogs by gathering on their faces in particular.
✓ Plastic bags (sealable). Great for putting over a bandaged limb to keep dry (secure with self-adhesive bandage), containing ice, or for storing a tick you just removed (add a little rubbing alcohol to preserve it, in case your veterinarian thinks it should be tested for infectious disease). Also, it can be helpful to store all liquid items in sealable plastic bags to mitigate any potential leak or spilling of contents.
✓ Rubbing alcohol. Use to wipe down thermometer, instruments, and tools before and after use.
✓ Self-adhering bandages. These bandages stretch, are strong, conforming, and flexible, and secure wound coverings in place. When properly applied with padding or gauze, the material can be used as a pressure bandage to inhibit bleeding. Available in a variety of widths from different makers (including 3M’s Vetrap, Andover Healthcare’s CoFlex, GOGO’s Self Adhesive Bandage Wrap).

✓ Splints. To immobilize an injured limb for transport. Our favorite is the lightweight and durable SAM Splint, which is constructed of two layers of closed-cell foam with an aluminum interior. The material can be cut with ordinary scissors to adapt to any size and can be bent into any of three simple curves, becoming extremely strong and supportive for any fractured or injured limb. Waterproof, reusable, and latex-free, it requires only a wrap or tape to secure an injured bone or stabilize a joint.
✓ Sunscreen/sun protection. Dogs with white or light fur, thin coats, or exposed skin (such as pink or lightly-pigmented noses and ears) are prone to sunburn and to other complications and diseases associated with sun exposure. Use protection when outdoors for long periods. Choose an appropriate sunscreen that does not contain zinc oxide or para-aminobenzoic acid (PABA), as these ingredients are toxic to dogs if ingested. There are also sun-protective clothing options available for dogs.
✓ Syringes, 10 milliliters (ml). For administering liquids orally to your dog and to clean and flush wounds.
✓ Tape (duct and masking tape). Innumerable MacGyver-like uses, including securing a temporary bandage or splint in the absence of stretchy self-adhesive or bandage tape. Be careful not to use directly on your dog’s fur or skin as removal can be painful and cause more damage. You don’t need 25 yards’ worth; if you use these products around the house, save the last few feet on the roll for your first-aid kit.
✓ Tick remover tool. Once you have used a tool made expressly for tick removal, you’ll never use tweezers for this purpose again. Place the removed tick in a sealable plastic bag with a little alcohol. Follow up by contacting your veterinarian to see whether she advises having the tick tested for its potential to have transmitted a disease to your dog (anaplasmosis, babesiosis, bartonellosis, ehrlichiosis, hepatozoonosis, Lyme disease, Rocky Mountain spotted fever).
✓ Waterproof storage bag or container. For storing supplies such as bandages and gauze that can be damaged by moisture.
✓ Water purification tablets. Water purification tablets can ensure safer drinking water without having to rely on a heat source to boil water. They can provide protection against microbial regrowth and can keep water safe to drink for 24 hours without additional treatment. Products vary in regard to efficacy against pathogens, shelf life, and wait time.
✓ Wound disinfectant/antiseptic. To kill the types of bacteria and yeast that commonly lead to infections in dog wounds. Safe disinfectants include chlorhexidine diacetate solution (not scrub) and povidine iodine solution. But the pre-diluted strengths that are ready to ise! If not pre-diluted (check the label!), the disinfectant will need to be diluted to the strength indicated on the label for safe use. Chlorhexidine diacetate should be diluted to a 0.05% solution, while the povidine iodine should be diluted to a 1% solution for safe and effective cleaning and disinfecting. If not diluted correctly, it can damage tissue.
✓ Wound flush. Used for cleaning/irrigating wounds. Premade sterile saline wound wash is available for purchase; the solution can be used to quickly, easily, and effectively clean a wound, remove debris, and dislodge bacteria from damaged tissues. Warm tap water, warm saline solution (made with one level teaspoonful of salt or Epsom salts to two cups of water), or saline eyewash can also be used. If possible, try to clip away the fur from around wounds before cleaning. Do not use hydrogen peroxide to clean wounds as it can inhibit the healing process.



Great ideas! I’m going to put together basic kits as gifts for my dog-owning friends!
I would love to have you explain (in detail) on how to make a Bloat Kit to take along. I just inspected my kit & found the plastic tubing for the throat had degraded in some spots & my piece of wood to keep the mouth open was not looking too healthy!
Is a self-measured, plastic throat piece to relieve the gas & cut piece of wood to keep the mouth secured – and easier to get the tube down – as good as the commercial (expensive) kits? Off the top of my head, I have forgotten how far down the throat the tube goes and where the 2 points of resistance are. And after you get obtain a syringe of the proper size (thank you Doctor!) ask yourself if you truly have the guts to slam a needle into the left side of your dogs body to release gas.
If you’re squeamish, and fear no one will be around to use your kit, don’t stand there staring at your dying dog and wondering what to do. Even if you follow ALL the instructions of a commercial bloat, the next step is to drive like an idiot to the nearest Veterinary Emergency Hospital. (Have a friend call the Clinic so they can prepare for your emergency – that way no time is wasted.) Remember to keep the dog lying on its right side and as calm as possible.
I loved your article Ms Dobbins & would love to have you do something on Bloat Kits (are they worth commercial ones worth the cost??) I always look forward to Health/Injury Treatment and Training/Behavior Treatment as the first 4 parts of The Whole Dog Journal – both the printed & digital copies. Keep up the great work – we need you!
“Team Cop & Deb”
Cop = 3 year GSD, STAR Puppy, HT, CH, SDiT,PSDiT
Deb = incredibility old human, who can barely train due to several serious injuries! ex-Army MEDDAC, 28.5 yrs in Law Enforcement
thanks that is agreat for travel too
I would like to order the medical kit
more information on kratom u street
Well written and informative post! Thanks!!!
This is all helpful, thanks. I may have missed it, but if needle nose pliers aren’t on the list, I suggest them, having had a recent dog/porcupine encounter. They now go in our hiking bag every time.
A very informative article. You mentioned items that I would never have thought of including AND what I liked most was you that items you indicated are newer products that are easy to use, are less traumatic to the dog when removing – non stick gauze? I didn’t know there was such a thing. I never heard of several items you mentioned which would be wonderful to have on hand in case of emergencies. I had always worked around difficult injuries and had no idea there were products made for specific indications. I am waaayyyy out of date.
We will be upgrading our dog emergency kit. We also keep a Thundershirt in ours as one of our dogs has a fear of fireworks and thunder.
LOL. The smallest kit is the “human first aid kit”…